
I get giddy when I am asked to restore something as beautiful as this antique door. Even worn she is beautiful just wait till you see her restored.

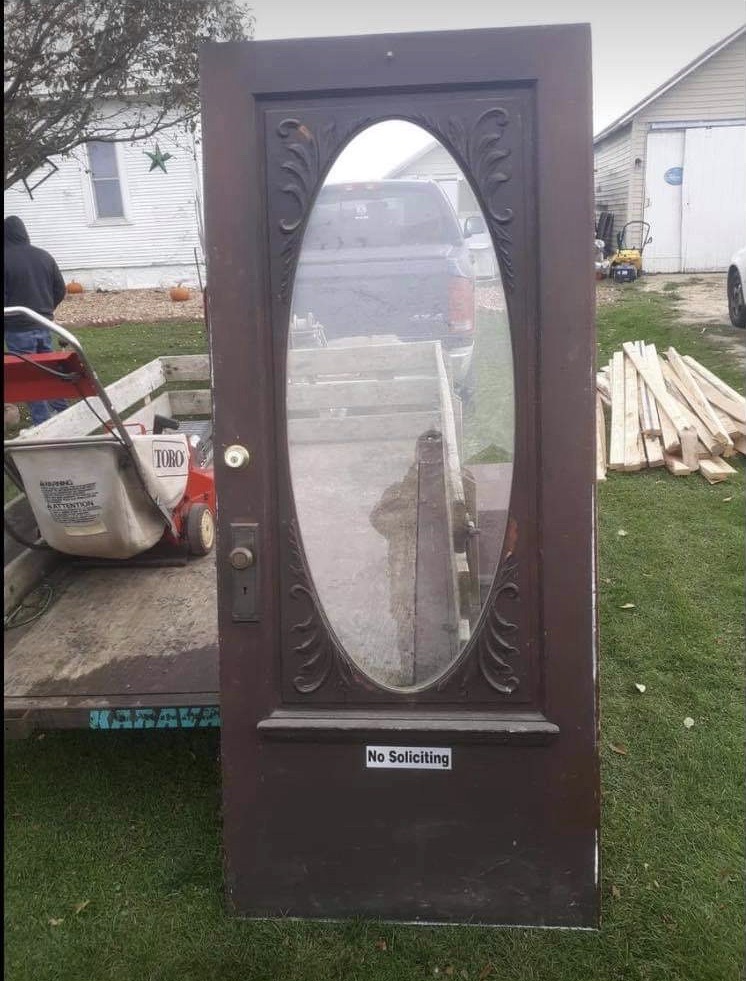
Restoring something like this can take some time and a lot of elbow grease. I can only do one side at a time so after flipping it I have to start all over which can add a lot of time onto the process. I also have to allow ample time for the finish to dry before flipping. If the finish is too soft when I flip it could leave marks on the finished side. I typically wait a weekend before flipping.
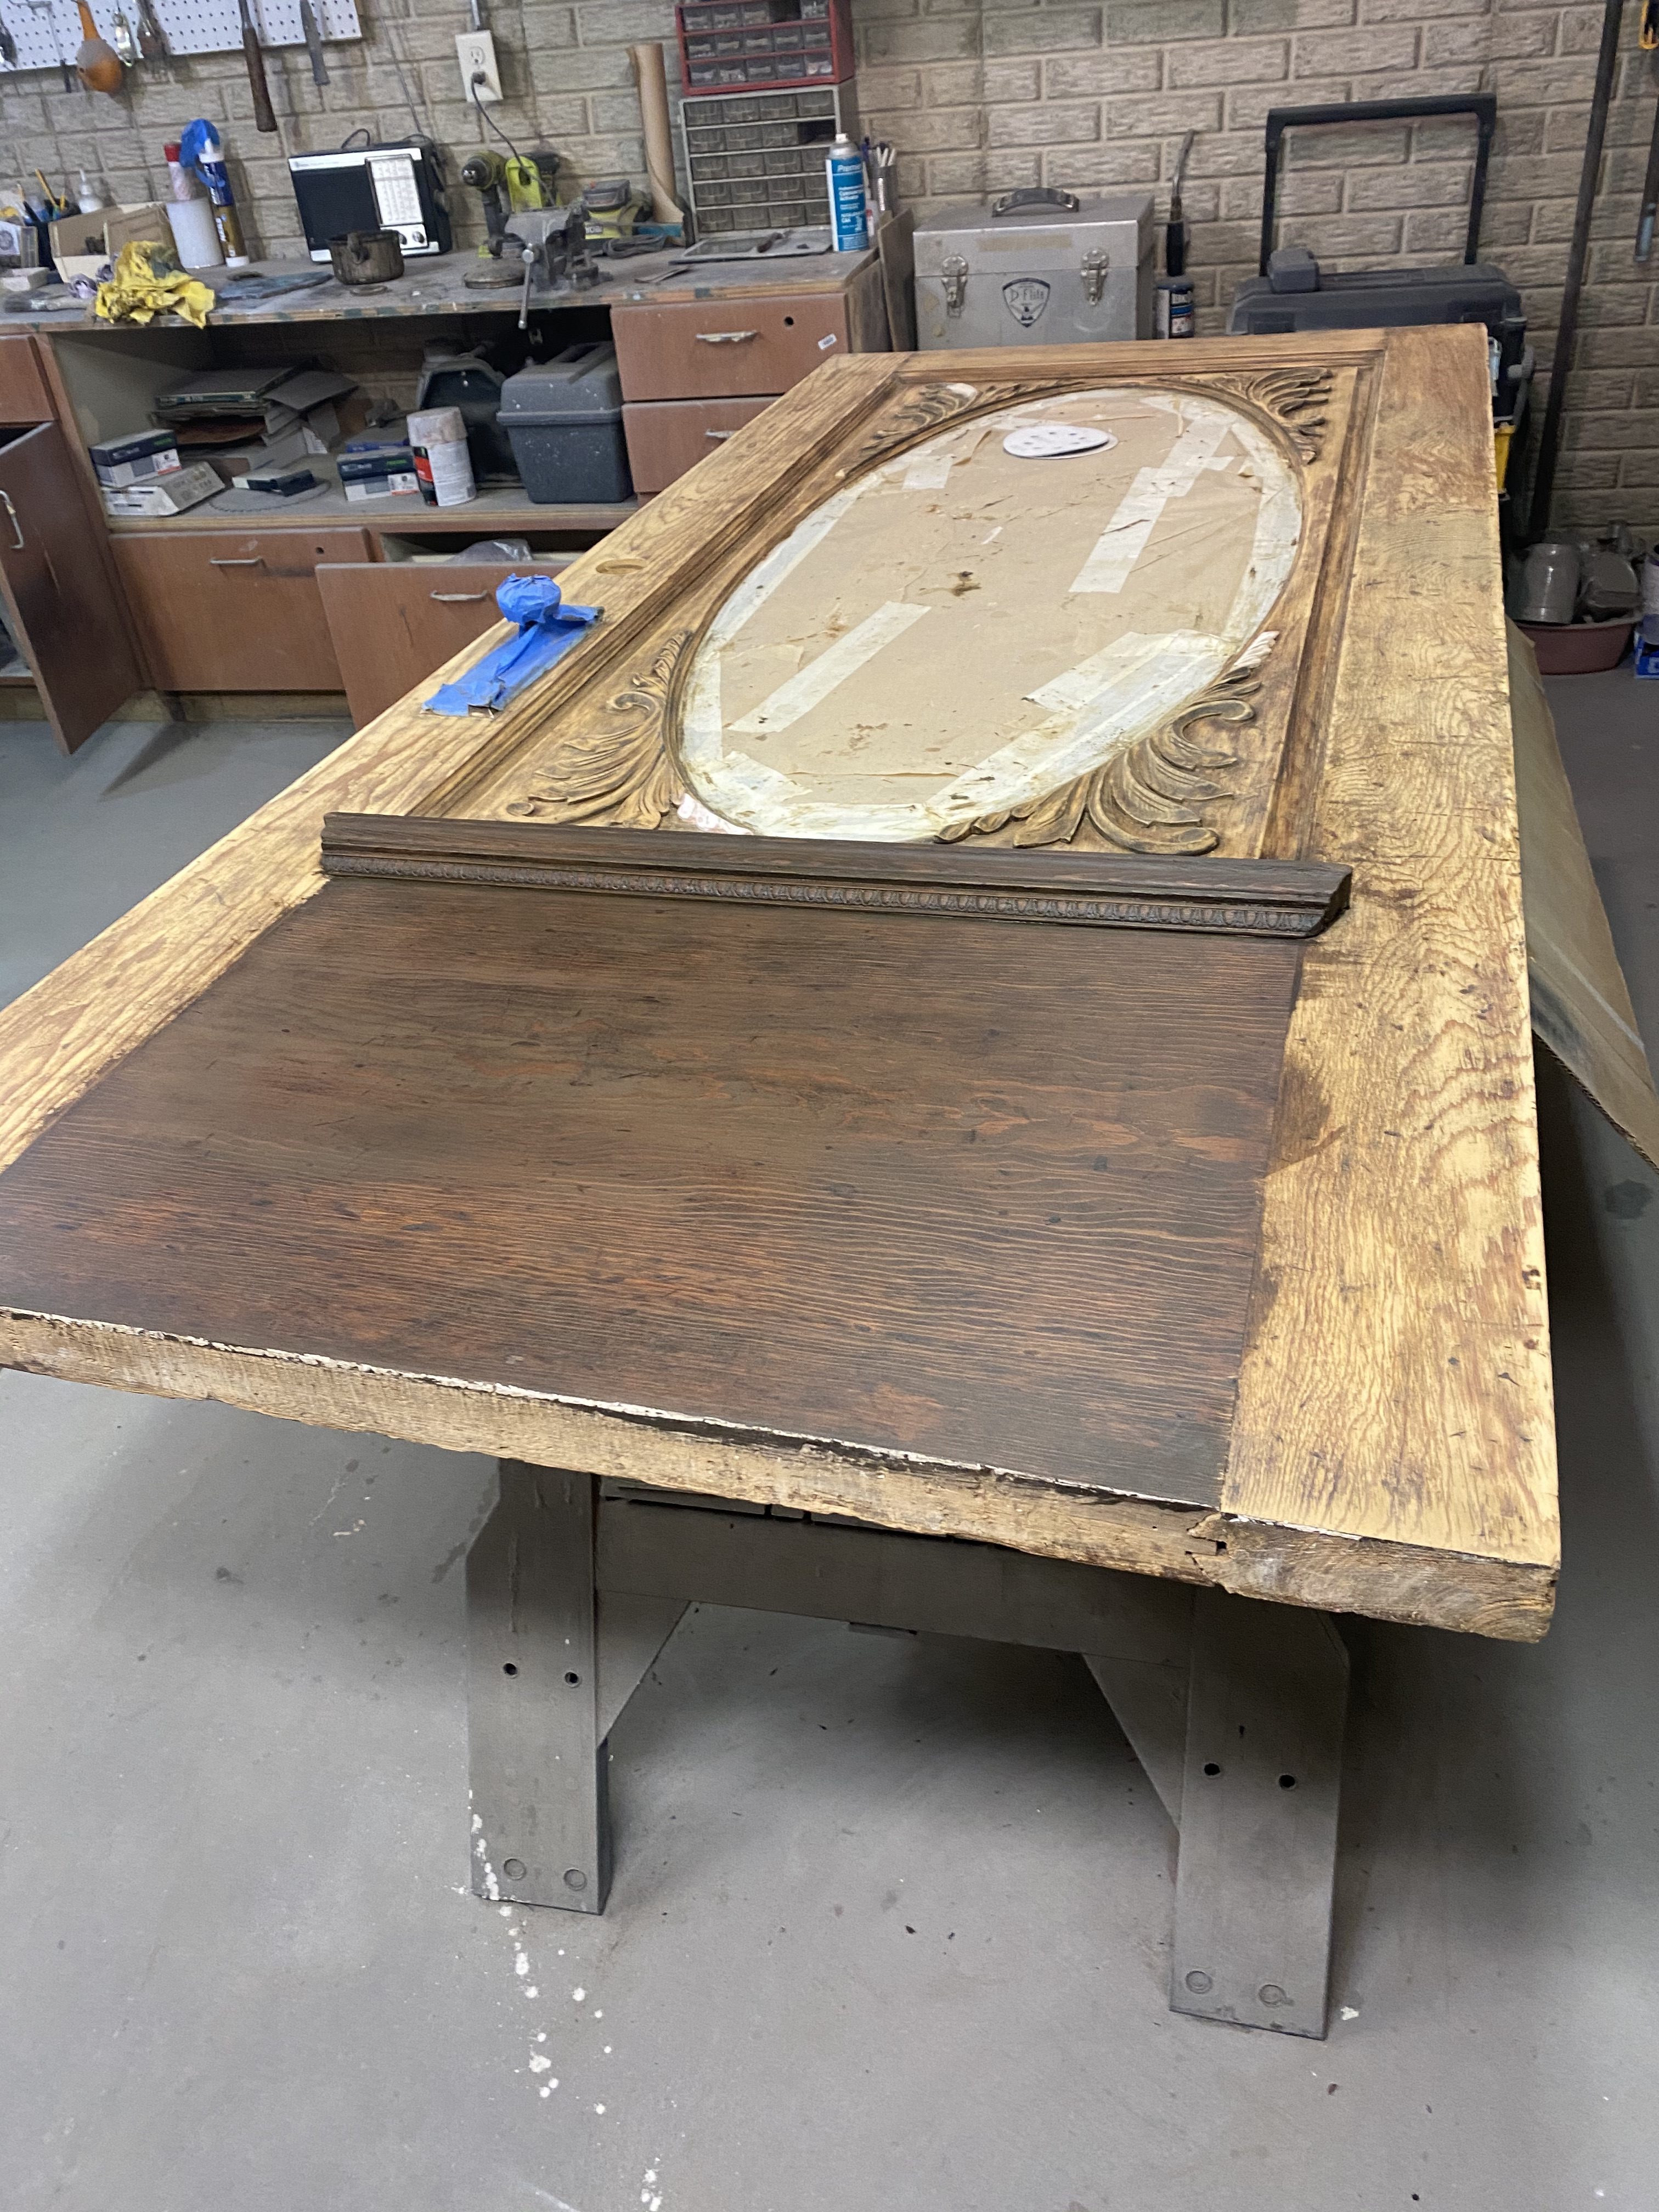
Starting Restoration
After taping off the glass and removing hardware I start with stripping. If you want to read more about stripping read this. I use citrus strip, because it works great and is very low odor. It is however very messy all stripping is messy. Make sure you have clothes you can get dirty, gloves, goggles, and maybe even a mask. (Not a home made mask a chemical mask) I will use a variety of tools such as steel wool, scrapers, and wire brushes to clean out all the goop.
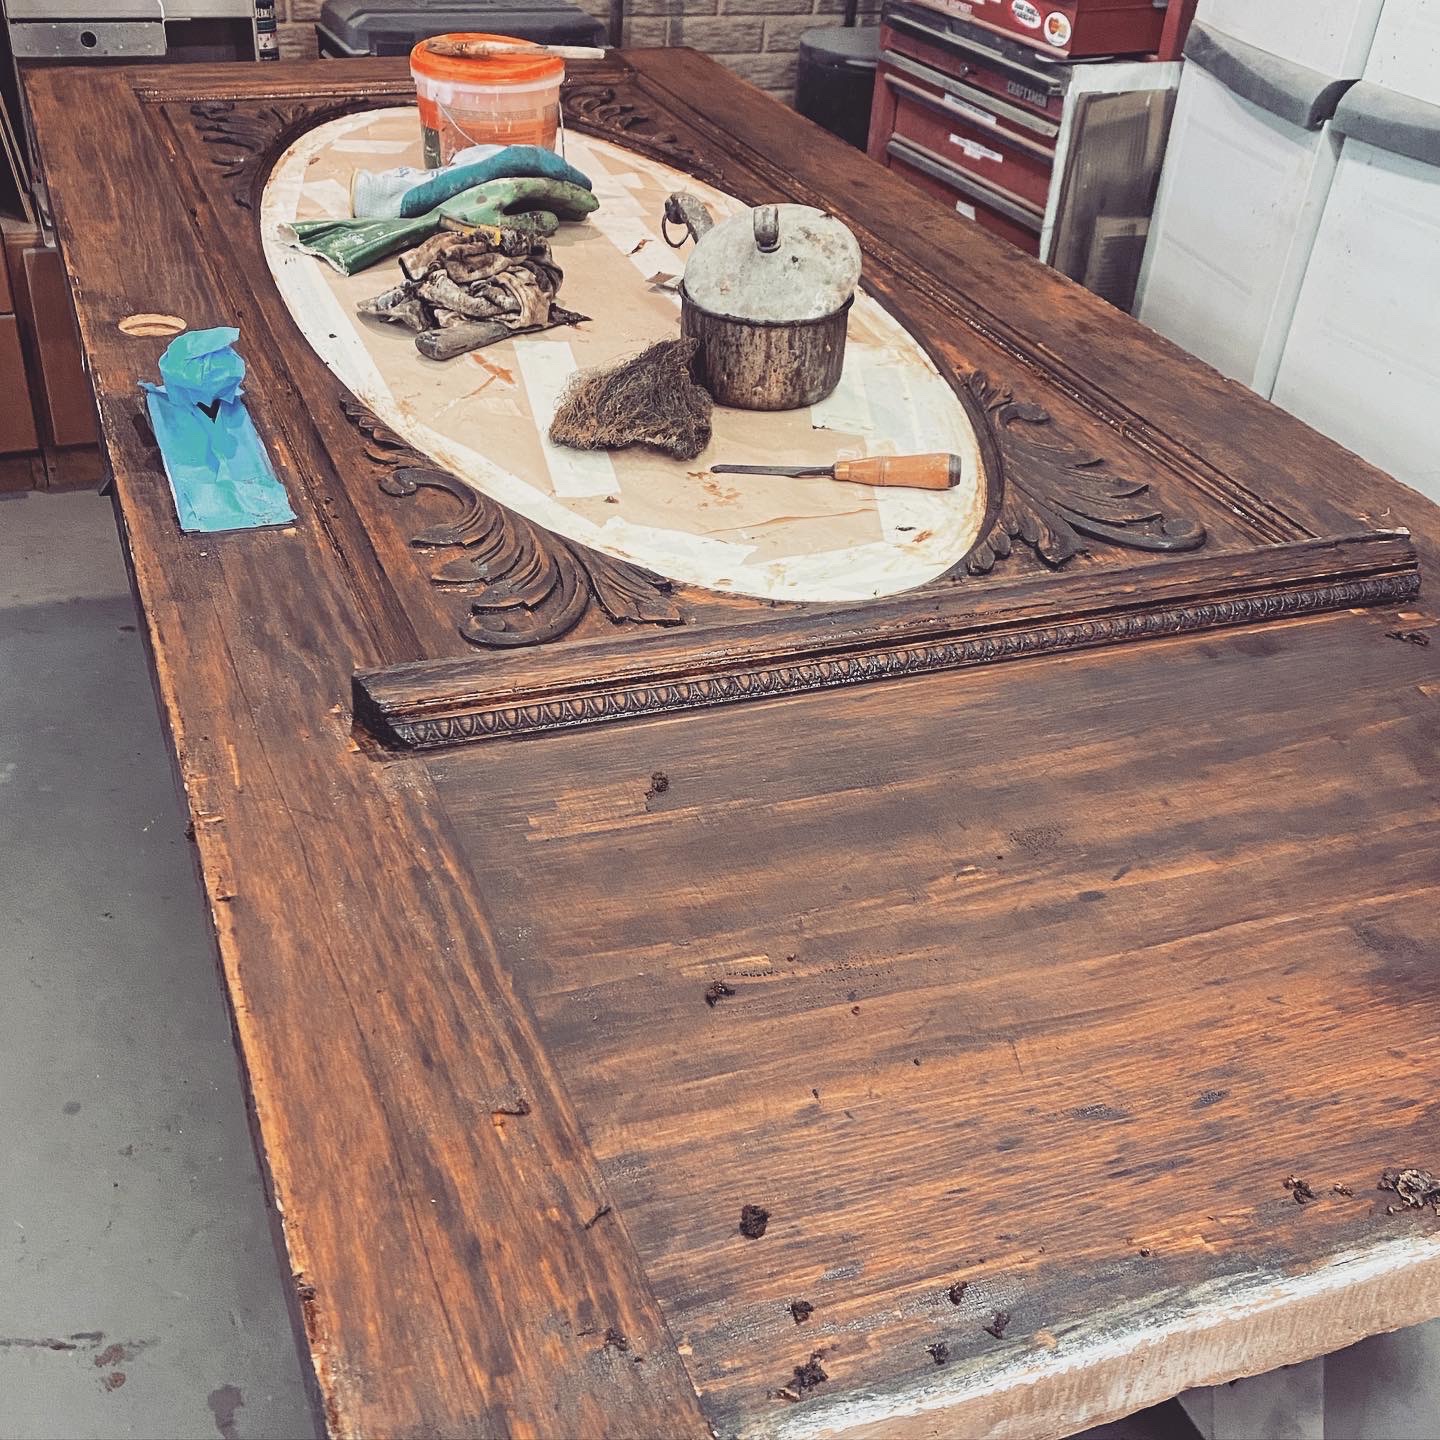

After stripping and the door was thoroughly dry it is time for some sanding. Sanding pads like the ones Uneeda make are perfect for the contours on this door. However you will still need to hand sand to really get into the crevices.
It is time to address the repairs, there is some molding missing and a lot of dents and scratches that I want to address.
Molding Repairs


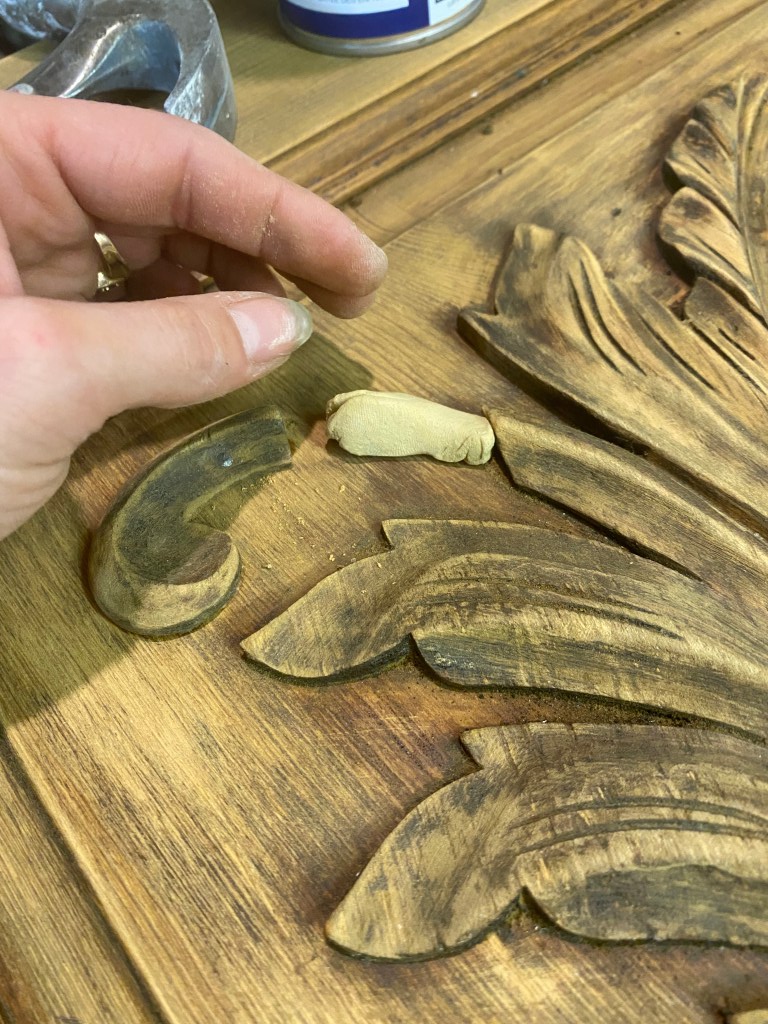


If you look at the second photo above you can see I used tack nails to one attach the loose piece. The other nail I added so that my epoxy has something to grip onto while I mold it. After I repaired the molding with Mohawk Epoxy Sticks it was time to address some of the dents.
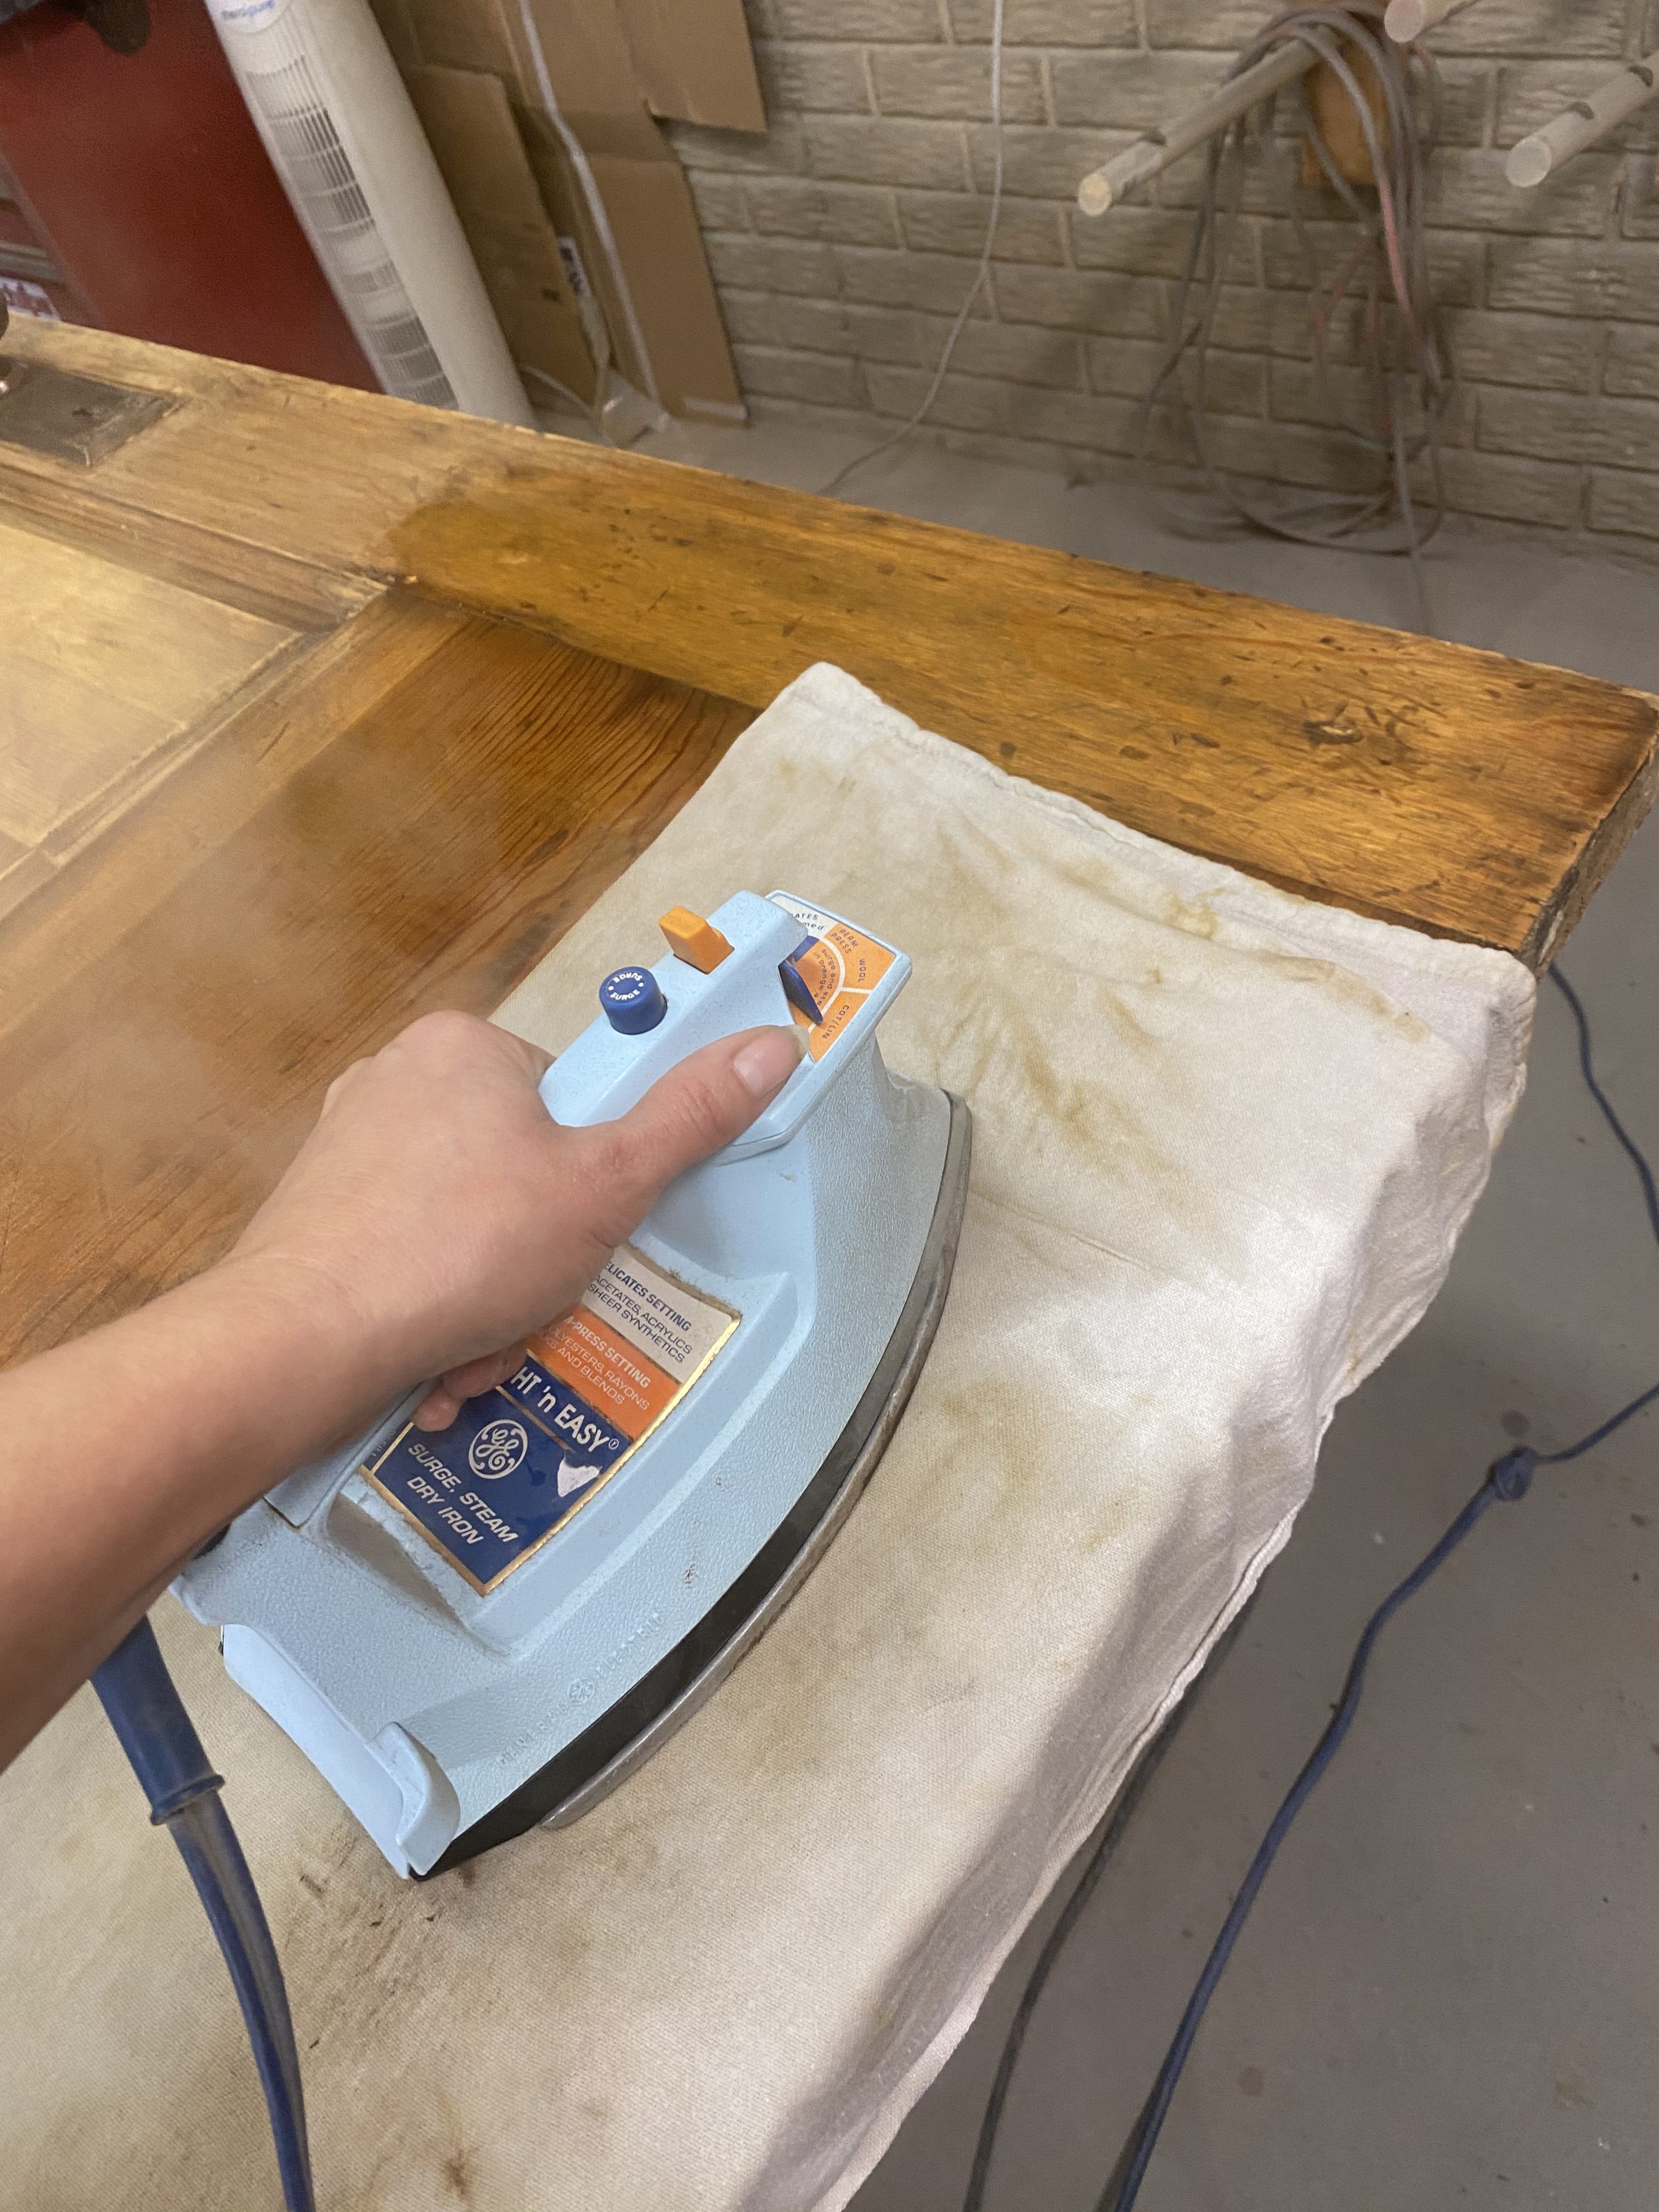
To get some of these scratches and dents out I steamed them using an old iron and a lint free towel. It won’t always get all of the dents out but as you can see on the side by side photos some of the shallow dents have been removed but the deeper ones are still evident. Luckly for me the color on this door is darker so the dents will be concealed.
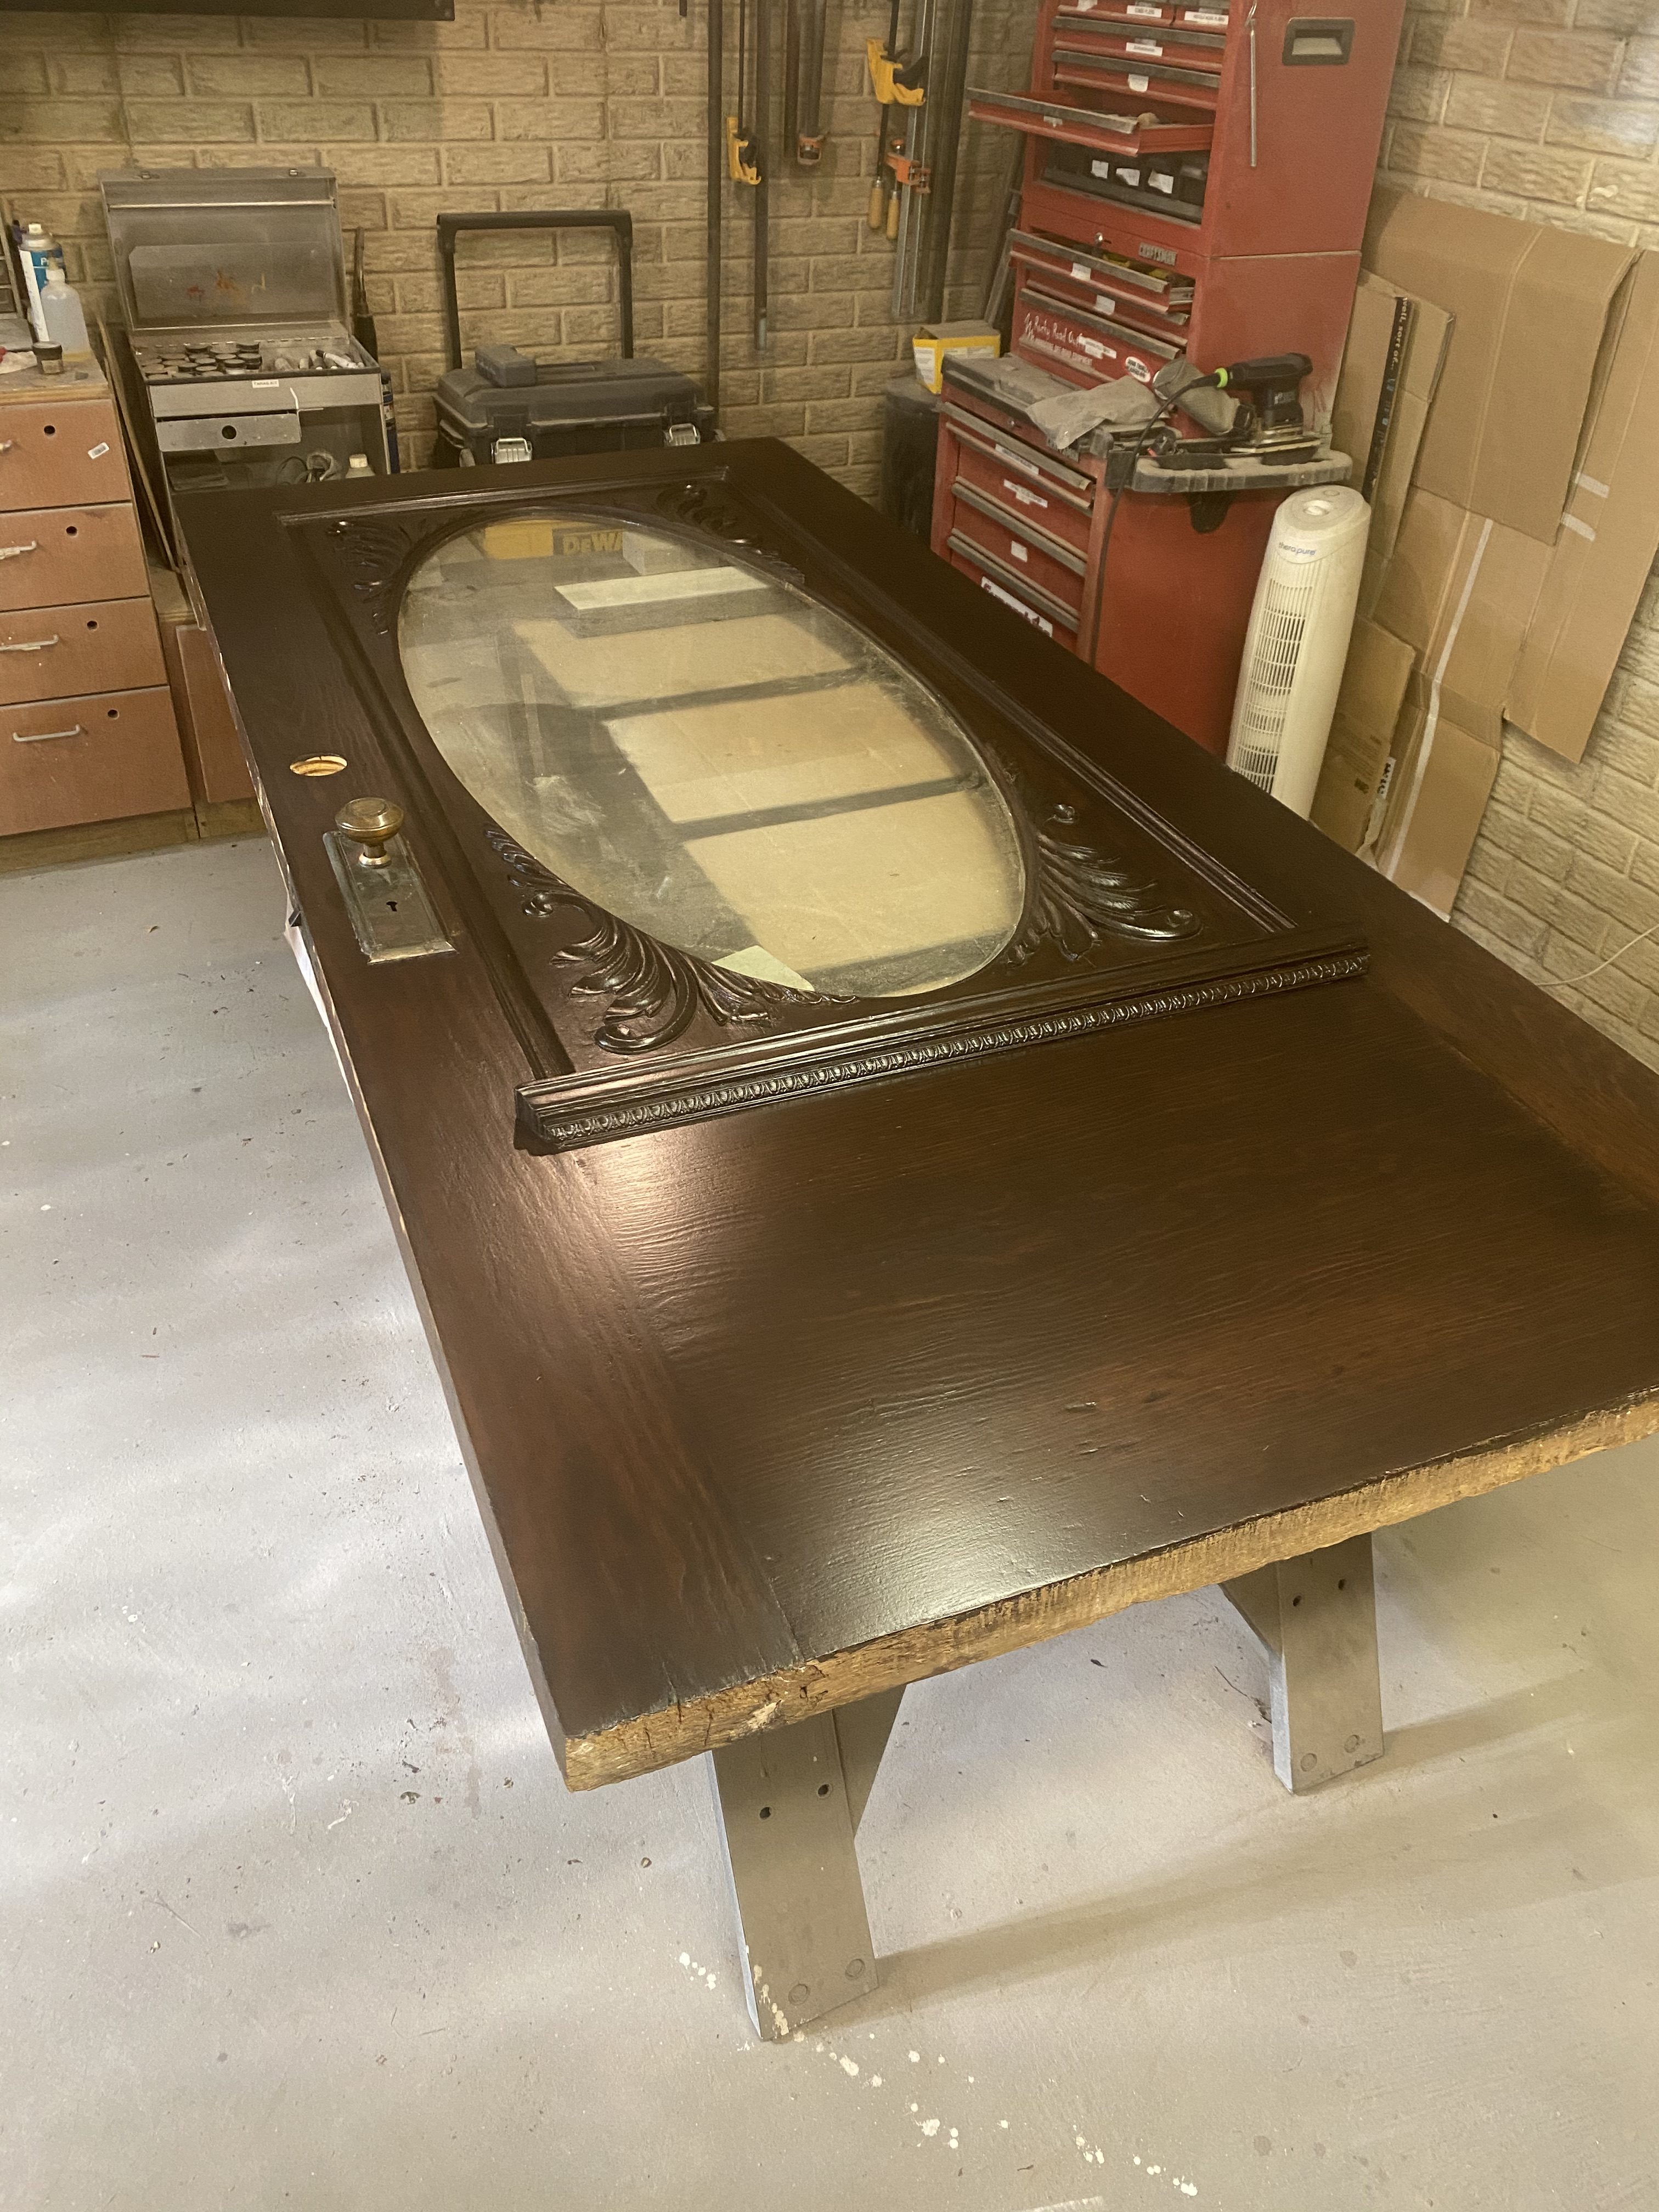
Staining and Finishing
Now that all the hard work is done on this antique door I can start to stain and finish. I stained this a brown mahogany from General Finishes. Because this is an exterior door and our winters here in Wisconsin can be pretty rough I clear coated with Exterior 450 from General Finishes.
Here is the antique door all completed, doesn’t she look amazing? Once she is hung in place I will update with some pictures. She will be making her debut at Heirloom Tea Room and Events in Oconomowoc WI.
Thanks for reading and happy refinishing.
Many Blessings
Tara Lou
**This blog contains Affiliate links please read my disclaimer page for more information.


Leave a Reply