
Stripping is a lot of hard, gross, goopy work and lets face it no one likes to do it. So, I recently created this beautiful grey stain look without stripping down to the raw wood.

Lets talk about when to strip furniture for just a minute. When the existing finish is failing it is absolutely necessary to strip before proceeding. I go into more detail on how to strip furniture on my post about 3 options to strip furniture. Flaking, soft, or very dirty finishing this technique will not work.
My client wanted a medium soft grey stain on her dinning room set and I cringed at having to strip the entire set down to raw wood. Toning wood is very common as I typically say you can always go darker but not always lighter. I tested out an old cabinet down and with some color manipulating I was able to achieve the perfect grey!
The Process
Standard oak is a honey color which has orange tones in it. So I very carefully selected the colors based off of the orange tones. Cue in the color wheel, I need blue a blueish grey to help me cut out the orange tones. It won’t look to bluish promise.
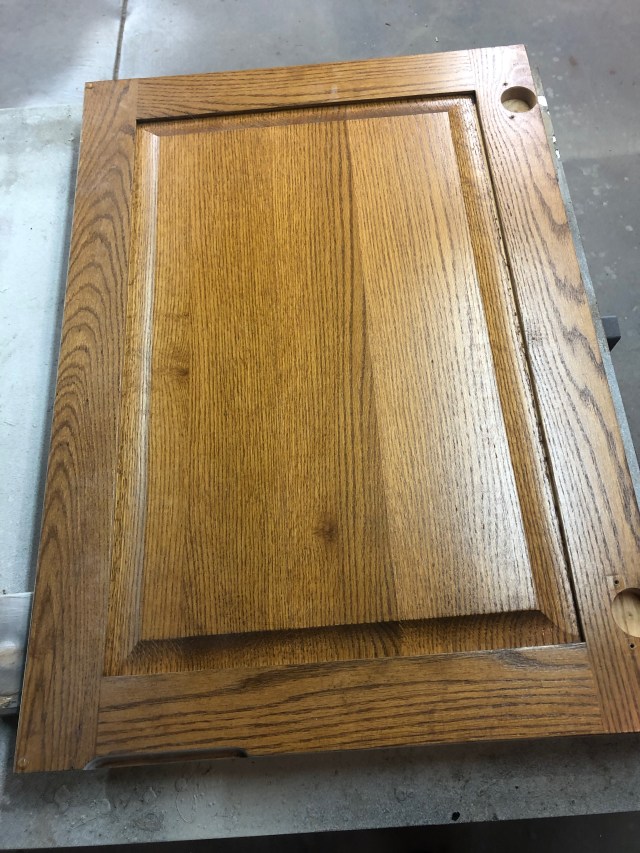
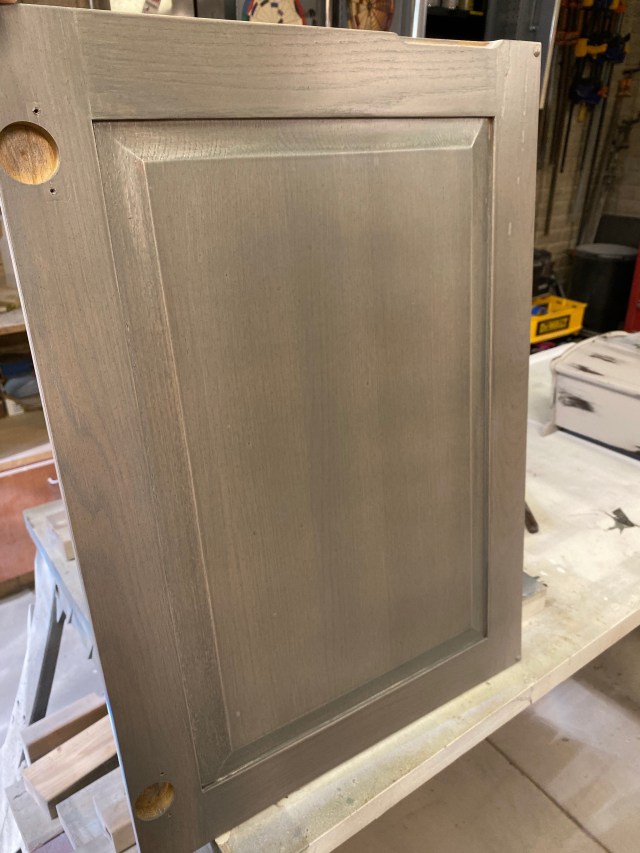
Here is my nice honey oak cabinet door. Now of course if you know me you know what I am going to say you need to do first………. proper prep work.

Clean Denatured alcohol and water 
Scuff Sand
- Cleaning: Denatured alcohol and water with my favorite mirlon scuff pad. Wipe it all clean and then start sanding. Used a 220 grit sandpaper. I don’t want too rough of scratches but I do need to scratch the finish up enough so I have something for my new products to adhere to.
Uneeda sandpaper and sponge sanders are my go to brand. (not and ad I just really like their sandpaper)
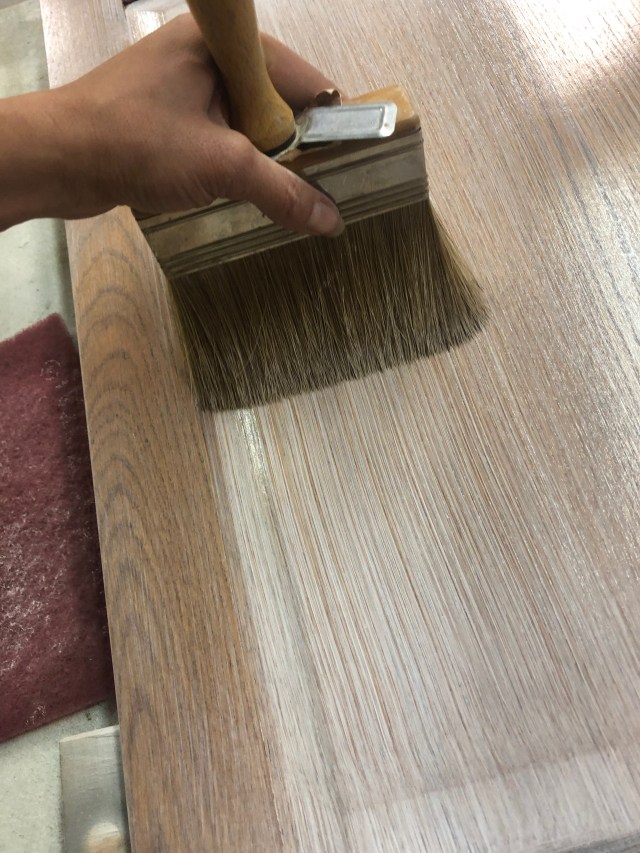
2. Glazing: First started with my white glaze Winter White by General Finishes. Apply a generous amount on and used a large deck brush till it was almost dry and my brush drags. You may also want to keep your Extender on hand just incase.
The reason I started with a hand glazing is because the grain will push out sprayed on toner colors so you almost have to start by brushing on the color.
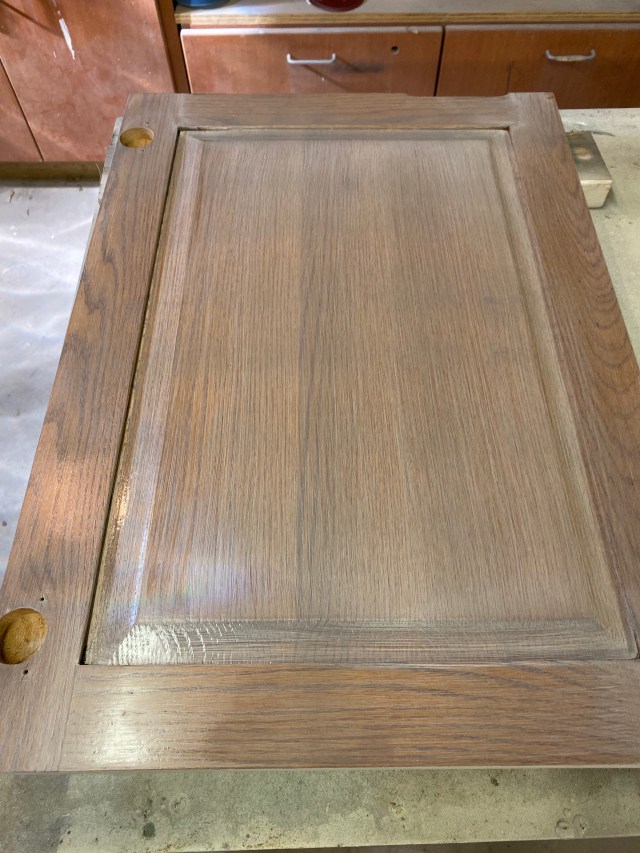

3. Next up: Toning, I took my clear finish and added 20% of the greystone stain to my finish and sprayed on one coat. If you do not have a spray gun you can sponge brush this on. Just be sure to have some extender on hand for longer brushing periods.
TONERS: I know toners can be a tad confusing but it is a mixture of clear finish and stain. Usually about 20% stain (strained) and 80% clear finish. This makes the finish colored but yet still transparent. This way you gradually build to a color or add a touch of another color to achieve the perfect color for you piece.
NOTE: Most finish manufactures suggest only 20% of a stain added to your finish (so be sure to check with your finish manufacture), too much stain you could get a finish failure like fish eyes.
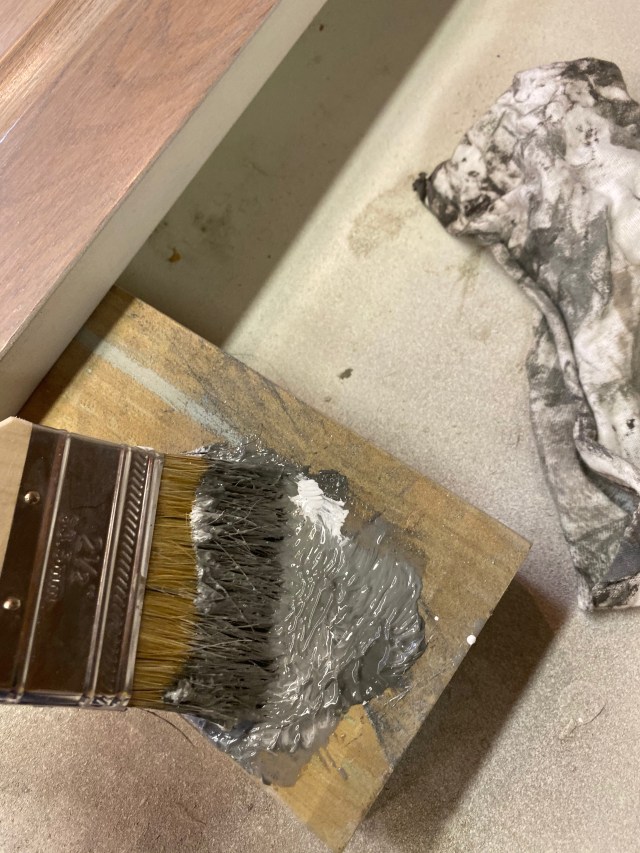

4. Glazing: Then I mixed the winter white and greystone with my chip brush and brushed it on the door. Finished off with my deck brush until the brush drags.
Finishing Up (you are almost done)
5. Toning and Top coat: Sprayed on one more coat of toner and scuffed. Then one clear coat and she is all completed! (For easy dust removal use these dusting rags) You can still see all of the grain and it doesn’t look like honey orange anymore!! Your done the perfect grey stain!
Side note: Every project is different from color to wood type which may require different steps. So I highly suggest you test the back of a door, or inside of a table leg before doing your entire project. I have tweeked this formula a few times some with less steps and different color outcomes. Follow my instagram if you want to see more of my creations.
Some of my other projects:

This is another project I did using this formula however this is mahogany wood so I was a little worried that it would not turn out but it looks great!


Products used


UPDATE
I have been asked how the table is doing. It has been 6 months and it looks fantastic! Check it out for yourself:


Leave a reply to Tara Lou Cancel reply